What is the URL for my map?
You can get the URL link for your map by going to ‘Print or Share’ in the menu, and ‘Share Link/URL’ is the first item in the list. Select the top URL to share a view-only map with others. If you want to share a fully editable map, use the second URL which says ‘editable version’.
How do I get PDF/PNG image of my map for use in a PowerPoint presentation or Word document?
You can purchase a PDF or PNG image of your map. Select ‘Print or Share’ from your map menu, then ‘PDF/PNG Image’. You can customize your map image here and look at pricing information. Make sure you preview before ordering, as the map image will look different to the interactive map. Your map image will be emailed to you, so check your email address is correct.
If you are a Power User, simple PDFs and PNGs of your maps are unlimited and free. To upgrade your account, go to ‘Account’ and ‘Subscriptions’ to choose the subscription level.
How do I publish my map to a website or blog?
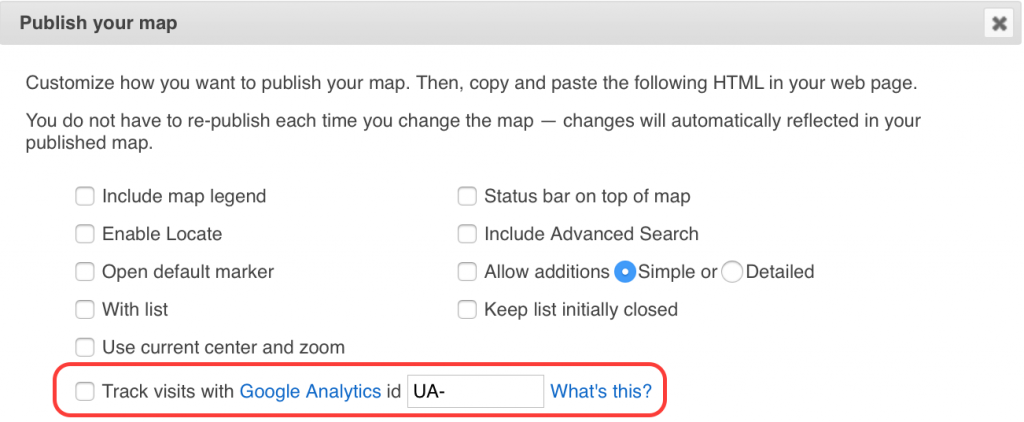
ZeeMaps makes it easy to share your maps with friends, relatives, co-workers, customers and others. You can publish it to any website, blog, or message board. Select ‘Print or Share’ from your map menu then ‘Publish in Website’. This will allow you to customize the way your map is published, and provide you with HTML code that can be copied and pasted onto your site.
Can I filter markers of certain colors from my published map?
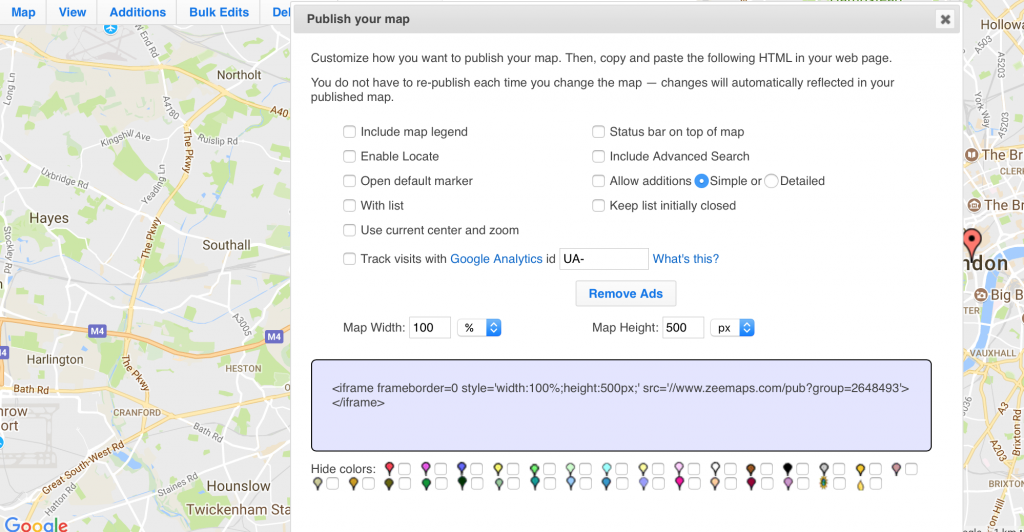
Yes, you can hide markers by selecting ‘Print or Share’ from your map menu then ‘Publish in Website’. This will allow you to customize the way your map is published, and you can check colors in the ‘Hide Colors’ section.
Can I show a list with my published map?
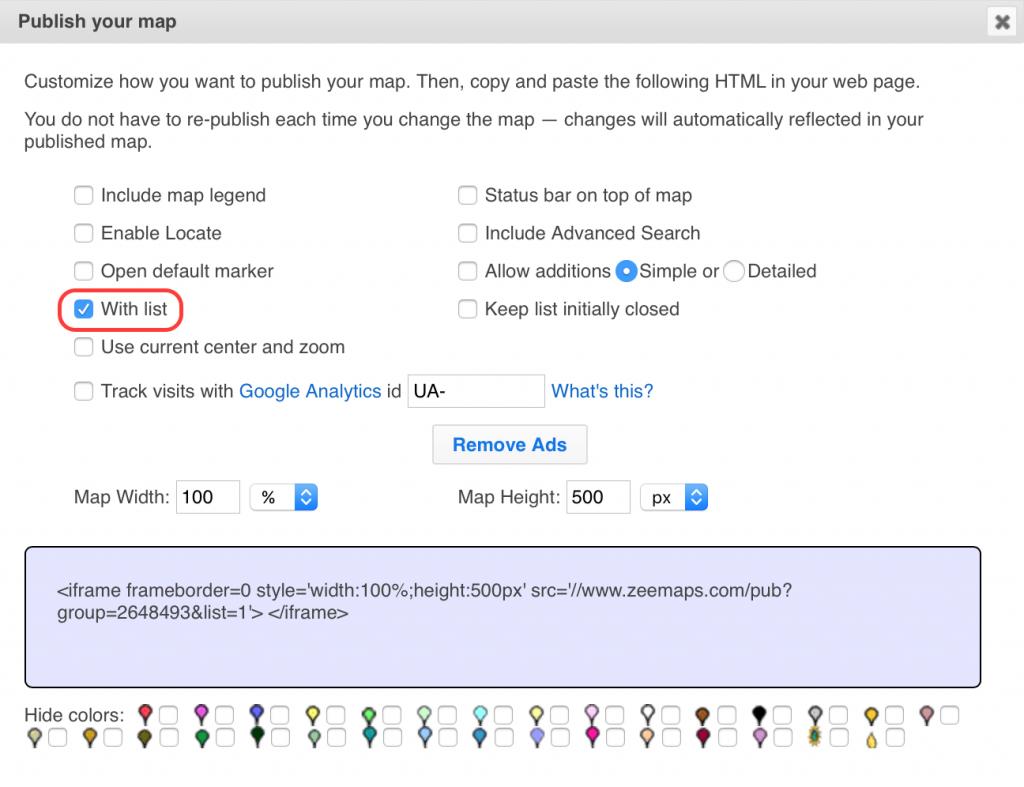
Yes, lists can be displayed to the right of published maps. Go to ‘Print or Share’ from your map menu then ‘Publish in Website’. Check the ‘With list’ box.
How can I make a default marker open up in my published map?
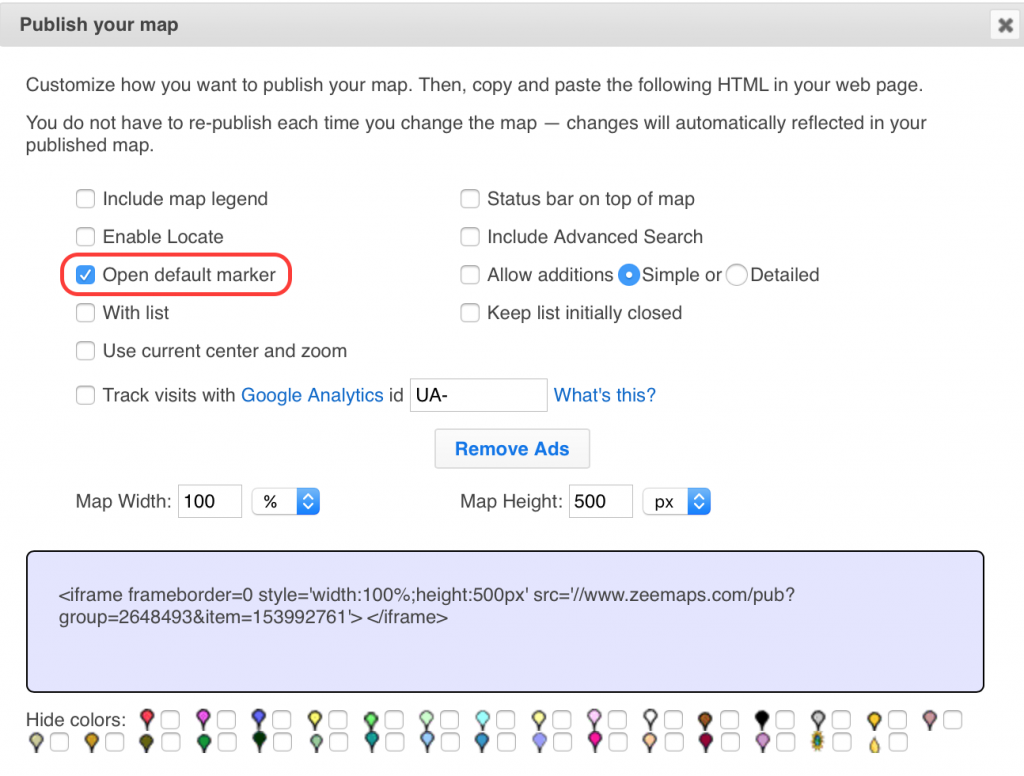
Click a marker on your map to make it the default marker for your published map. Select ‘Print or Share’ from your map menu then ‘Publish in Website’. Check the ‘Open default marker’ box.
Can I allow people to add entries to my map that is published on my website or blog?
Yes. Select ‘Print or Share’ then ‘Publish in Website’ from your map menu. You can customize various options. Make sure you check the box for ‘Allow additions’ and choose ‘Simple’ or ‘Detailed’ to get an ADD button on the published map. Then copy and paste the HTML that is generated into your web page.
How do I moderate entries added by other users?
If you want to moderate entries added by other users, choose ‘Settings’ from your map menu then the ‘Additions’ tab. Check the box that says ‘New entries must be approved by map Admins’. This means that when a non-Admin person adds a marker, it won’t be added to the map until it has been reviewed by a map Admin. Admins can move, change or delete any of these markers before approving and publishing.
How do I reserve certain colored markers for map admins?
You can set up your map so that only users with Admin keys can assign markers to the ‘reserved groups’. This is a useful feature for crowdsourced maps, where you might want to restrict certain marker groups, e.g., Editor’s Picks. To do this, select ‘Map’ then ‘Reserved Groups’ from your map menu. Select the marker groups you wish to reserve and hit ‘Submit’.
Can I set up a search for locations in my published map?
Yes. Go to ‘Print or Share’ then ‘Publish in Website’. You can then check the ‘Enable Locate’ and/or ‘Include Advanced Search’ options to get different search options in your published map. ‘Include Advanced Search’ is the most advanced, allowing your users to search for locations based on entry fields combined with distance search. ‘Enable Locate’ will add a small input box to the published map.
Do I need to re-publish my map every time I make changes to it?
No. Changes you make to your ZeeMap are automatically reflected in your published map, so you do not need to re-publish it when you make additions or modifications.
Can I track the number of people to view my map?
Yes, you can do this by using Google Analytics. Go to ‘Map’ then ‘Settings’ from your map menu, and select ‘Google Analytics Tracking’. You will need to create a Google Analytics account for the map. Find the code and enter it into the tracking ID box.
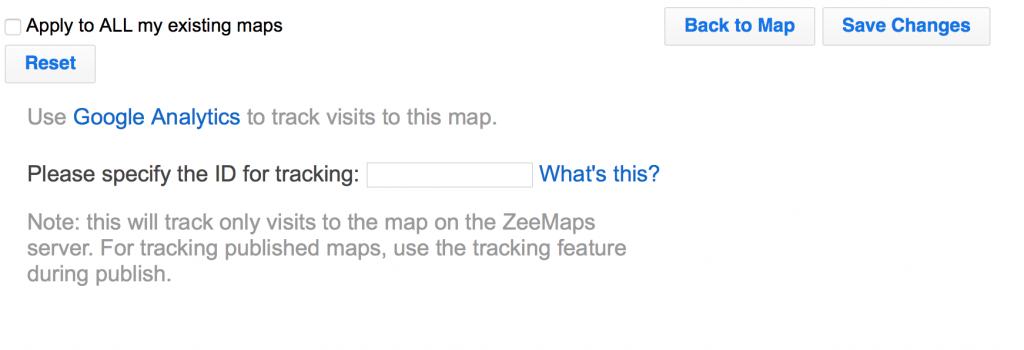
For maps published on a website, go to ‘Print or Share’ then ‘Publish in Website’. Select the ‘Track visits with Google Analytics’ option and enter the key there.
